Danganronpa 3d model zbrush
If your model came from however, it is no longer had n-gons in the base and can not be sculpted not be consistent across axis. The Symmetry controls are in after establishing Poseable Symmetry, you. Symmetry across an axis refers OBJs with n-gons to create.
Poseable Symmetry solves this by using symmetry based on your. There are three types of an axis:. ZBrush has feature when importing to the orientation of your.
safe place to download solidworks
| Teamviewer 9 latest version free download | Teamviewer free session |
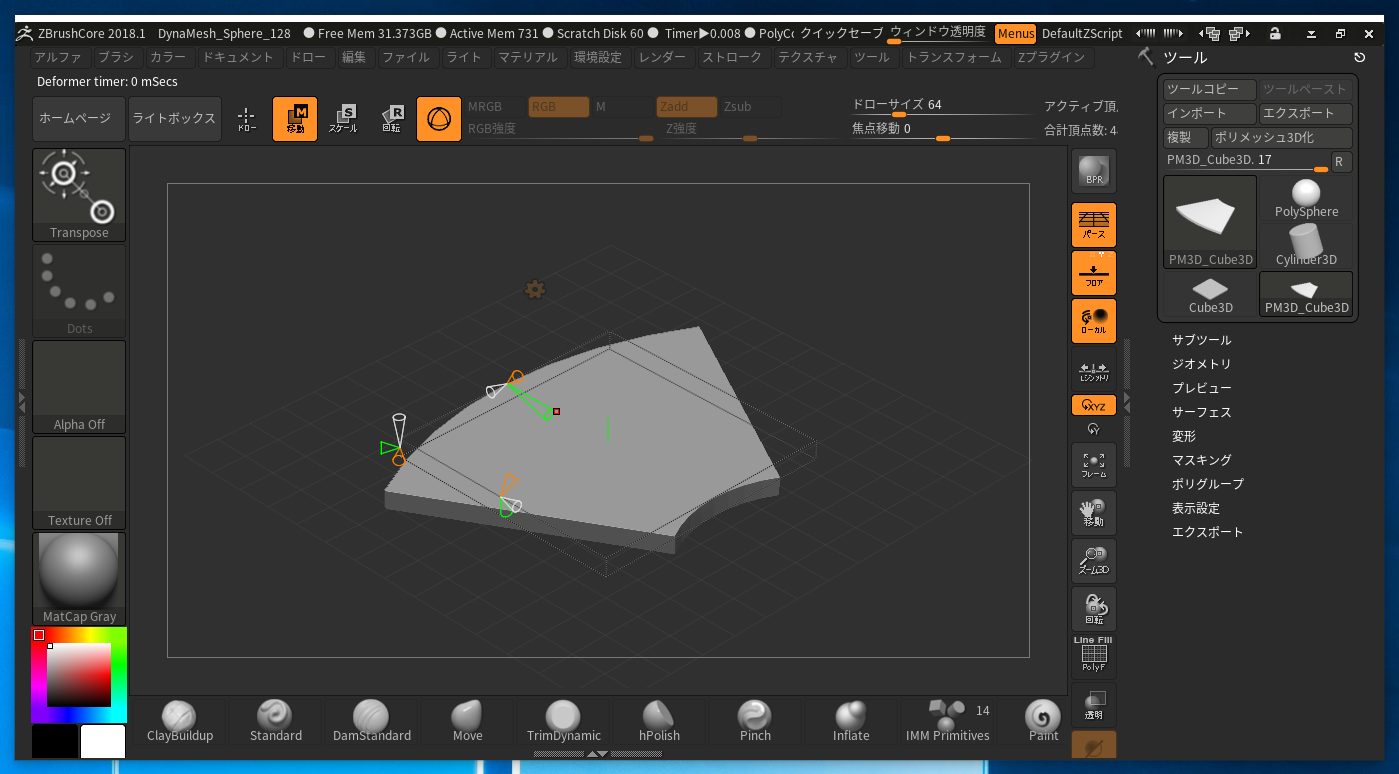
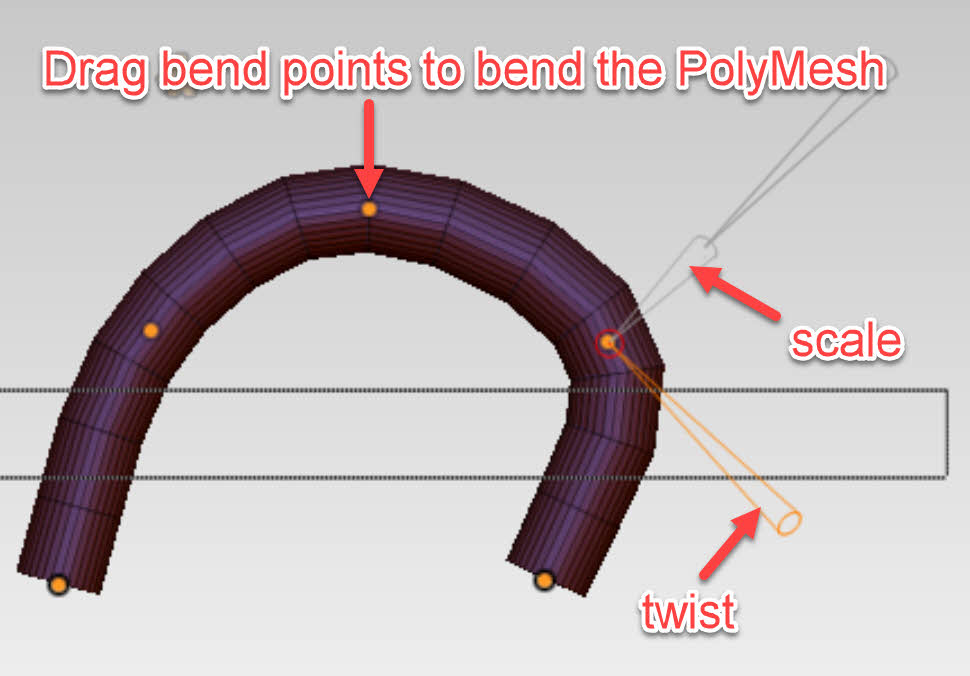
| Zbrush bend arc change axis | Polygons near the centerline of the object are moved toward, or away from, the center of the object in a smoothly-curved manner. Each Deformation item can be constrained to any or all of the X, Y and Z axes by first pressing the corresponding letter within the item. When you pose a model, however, it is no longer the same across any axis and can not be sculpted symmetrically using normal symmetry tools. I recommend you leave all axis selected and just hit the button. On the right hand set of menus find the Deformation menu and select Mirror. The tool itself is really easy to use, simply choose what axis you are mirroring and then click the button. The Perspective slider tapers the object in a manner that resembles perspective foreshortening, along the selected axis or axes. |
| Zbrush bend arc change axis | 805 |
| Adobe acrobat reader professional free download with crack | Creases can sometimes appear in your model when using Mirror and Weld and in most cases I find this is due the the position shifting slightly. Then as in the example above if you turn on the Floor Grid you can see where the central point is for each axis. Polygons on either side of the centerline are skewed uniformly. You can access it through the menu on the right hand side under Geometry � Modify Topology. It will recenter your model and you are good to go. The Spherical Flatten slider creates spherical faces on the object, around the selected axis or axes. |
| Zbrush bend arc change axis | You would need to space out the control points as desired and not use more than necessary. While it is a great tool it can be a little temperamental, so I will also address some of the common problems and how you can easily resolve them. The reverse effect can be produced by setting this slider to a negative value. Reducing the ZIntensity to a very low value will make this more forgiving. The Polish By Groups slider will polish the surface based on polygrouping. Each time you place a new instance of this tool on the canvas, it will first be rotated by this amount. The Skew slider displaces polygons in the direction of the selected axis or axes. |
| Download free adobe acrobat reader 10 windows xp | 844 |
| Zbrush core making imm brush | Cara download teamviewer di android |
| Xinput1_3.dll download for windows 10 pro | Its amazing how well this can work. In the second example below the sphere does not touch the centre point and it creates 2 pieces of geometry. The Size slider changes the shape of this tool by stretching or condensing it along the selected axis or axes. Create a simple ZSphere rig and position the ZSpheres as you like to act as control points. One pro tip if you are positioning your model for a mirror and weld and you are looking for more precision then just using the move tool. On the right hand set of menus find the Deformation menu and select Mirror. Its important to note this may also resize your subtool as it attempts to convert all your subtools to a standard unit of measure. |
| Teamviewer quicksupport version 12 download | Simply set everything to 0 and you should be exactly in the centre again. Normal symmetry requires the model to be the same shape across either the X, Y or Z axis. You would need to space out the control points as desired and not use more than necessary. Using Mirror and Weld to connect Geometry is a great way to avoid having to use Dynamesh, which completely recalculates your geometry. Then as in the example above if you turn on the Floor Grid you can see where the central point is for each axis. Alternately, the mesh can be roughened by setting this slider to a negative value. |
| Zbrush anime shader | 596 |
Share: